Exposure and the Milky Way
Milky Way Noise: Raise ISO or Fix It in Lightroom?
I experimented and it didn’t go so great.
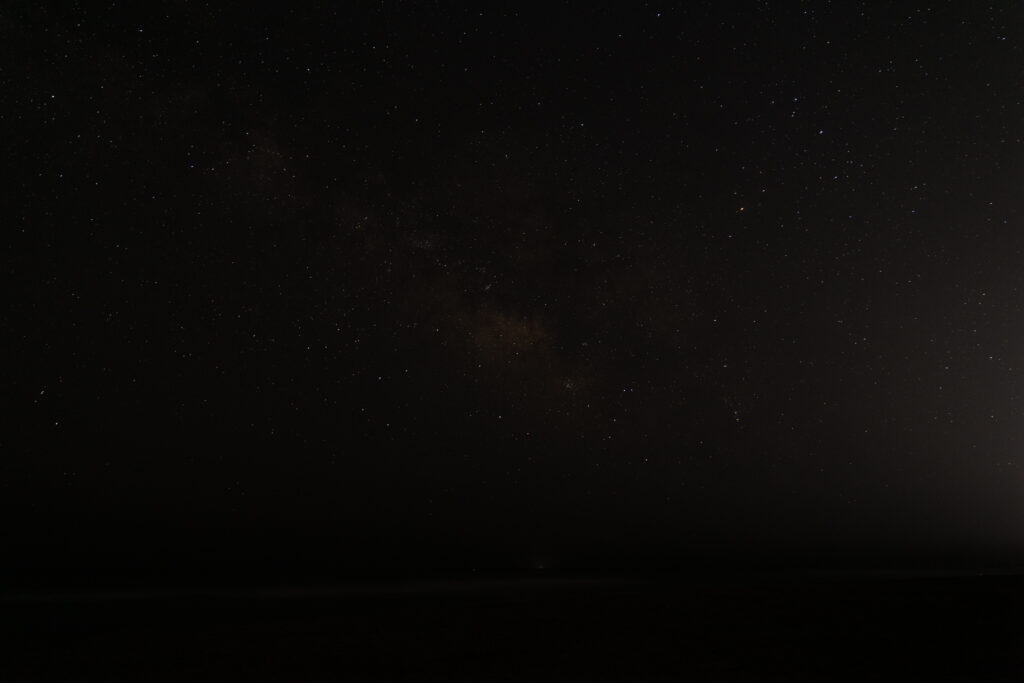
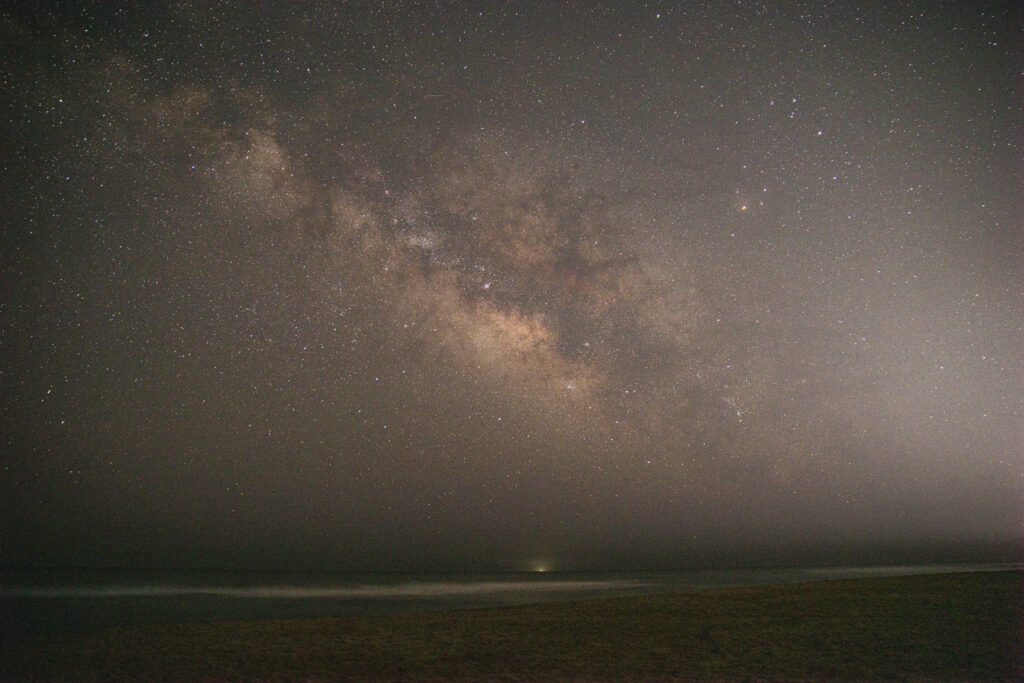
I was out under a sky that looks unreal. I took the shot. The back of the camera says it’s dark but fine. Then I get home, open Lightroom, bump Exposure… and the sky turns into noisey, crunchy confetti.
So let’s talk about what about these two options: should you shoot the Milky Way brighter in-camera by raising ISO, or shoot darker at a lower ISO and lift exposure later in Lightroom?
The short answer
Most of the time, it’s better to get your brightness in-camera. Not by blowing out everything, or turning your ISO into a dare. Just by avoiding a file that’s so dark you have to push it harder in Lightroom.
When you lift exposure in Lightroom, you’re turning up the whole signal. That includes the noise hiding in the shadows.
What “noise” really is (in normal-person language)
In Milky Way photos, noise usually shows up as grain that makes the sky look rough instead of smooth, color speckles (the green and magenta sprinkles), blotchy patches in the darker parts of the sky, and sometimes banding (faint stripes) if you push exposure a lot.
Some noise is normal and is going to happen. The goal isn’t zero noise. The goal is noise that doesn’t distract. This is where I over-compensated.
Why underexposing and pushing later often looks worse
Your camera records more usable information in the brighter parts of the file. When you underexpose the Milky Way, you’re stuffing most of your sky into the darkest tones. Then in Lightroom you lift those dark tones up.
But it doesn’t just lift detail, it lifts the whole thing.
A practical rule that holds up in the real world: if you’re regularly pushing Exposure more than about 1 stop in Lightroom, you’ll usually get a cleaner result by raising ISO in-camera instead.
“But doesn’t higher ISO add noise?”
This is where people get tripped up, especially beginners, and where I experimented and got burned. ISO doesn’t create light. It doesn’t make your sensor see more. It changes how bright the captured signal is recorded.
In plain terms, raising ISO gives you a brighter file straight out of the camera. Keeping ISO low and lifting later means you’re doing that brightening after the fact. For Milky Way work, after the fact often looks rougher.
The real limiting factors (why ISO becomes your main knob)
For the Milky Way, you don’t have infinite options. You’re boxed in by physics and by your gear.
Shutter speed is limited by star movement and whether or not you want star trails. Aperture is limited by your lens quality. That leaves ISO as your main way to get a workable exposure.
With my setup (Canon R5 + Tamron 24-70 at 24mm), that’s a normal place to land.
A simple test you can run tonight
Pick a Milky Way scene and lock everything down. Put the camera on a tripod, set your composition and focus, and keep shutter speed and aperture the same for both shots.
Take two frames. First, a darker frame at a lower ISO, where the histogram sits left. Second, a brighter frame at a higher ISO, where the histogram moves right without clipping the whole sky.
Now in Lightroom, raise Exposure on the darker frame until it matches the brighter one. Zoom in and compare the darkest sky areas, any smooth gradients, color noise in the shadows, and any banding.
Most people see the same thing. The pushed file looks harsher. The brighter-in-camera file looks cleaner and easier to edit.
What I will remember to do in practice (so you can steal it)
I’ll aim for a file that looks a little brighter than I want, but not blown out. That usually means I’d rather raise ISO than plan on a big Lightroom push. I’ll try to keep Lightroom Exposure moves modest, and I’ll use noise reduction as a finishing tool, not a rescue mission.
If you’re seeing a lot of noise, the fix is often not more sliders. It’s a better starting exposure.
A quick note about “expose to the right” for Milky Way
You’ll hear people say expose to the right. The helpful version of that advice is: get the file as bright as you can without wrecking it.
The unhelpful version is: crank it until everything clips and hope Lightroom forgives you.
Stars clip fast. Light pollution gradients can get weird fast. So yes, brighter is good! Just not reckless.
What changes when you’re shooting at the beach
Avon at the Outer Banks is its own thing. You’ve got a big dark horizon, a reflective ocean, and a sky that can be clean in one direction and a little glowy in another. That mix matters, because “bright enough” isn’t just about the Milky Way. It’s also about what the water and horizon are doing.
If the ocean is in your frame, lifting exposure later can make the water and the darker wave texture get noisy fast. It’s the same problem as any underexposed shadow, just with salt spray and feelings. Getting a brighter file in-camera often keeps the sky smoother and the water less crunchy.
The other beach-specific twist is light pollution and haze. Even if the stars look great, you can still get a bright band near the horizon. If you push exposure hard in Lightroom, that band can get louder and uglier. If you raise ISO in-camera and keep your Lightroom exposure move smaller, you usually keep that gradient more controllable.
So at the beach, my goal will still be the same: expose as bright as I can without wrecking the highlights. I’ll just pay extra attention to the horizon glow and the water, because they’ll tell on you.
The takeaway
If you have to choose between a darker file you’ll push hard in Lightroom and a brighter file you got by raising ISO in-camera, pick the brighter in-camera file most of the time. Our camera sensor collects photons. Lightroom only amplifies whatever photons you already captured.
So:
- If you expose brighter in‑camera, the sensor collects more photons, which increases the signal‑to‑noise ratio (SNR).
- If you underexpose, the sensor collects fewer photons, and Lightroom has no choice but to boost both the weak signal and the noise.
This is why a brighter RAW (not clipped) is cleaner than a darker RAW brightened later.
Your edit will go faster. Your sky will look smoother. And you’ll spend less time trying to un-crunch the universe.
admin
July 19, 2026
Photography
0


sourwood.photography@gmail.com
Copyright 2026